%20(1).jpg)
Shared Albums: An Event Planner’s Best Friend
Annual meetings. Retreats. Holiday parties. If you’ve ever been a member of your company’s planning committee, you know how much work goes into organizing these events.
A lot of time is spent making sure everything runs smoothly for work events, but one of the most challenging and often overlooked parts of planning is how to best capture and share photos from the event. While a professional photographer is sure to get some great shots, it’ll come at a cost that might be out of your budget. You could beg guests to text you their best photos after the event, but do you really have the time and energy to do that?
Luckily, Shared Albums give you a headache-free way to collect photos and videos from a group of people.
.jpg)
Here are some reasons to use Shared Albums for your next event:
Easy Photo Sharing
Invite attendees to upload their photos with one simple link. Shared Albums also offers an easy way to share the photos with everyone after your event. And did we mention that it’s 100% free?
Create Buzz
Get guests talking about your event by letting them share their experience through your Shared Album. Easy photo sharing from any device creates excitement that will make your event the place to be.
Private + “Safe for Work”
Shared Albums are private and only available to the people you choose. You can also control who sees your pictures by requiring a password to view your album. Lastly, Shared Albums give you the option to review pictures before they appear in your album so you can ensure that they’re suitable for work.
Unlimited, High-Resolution Photos
Collect as many photos and videos as you like with unlimited storage and unlimited contributors. Even better: photos are stored forever and can be downloaded at their original resolution days or years after your event.
Ready to start? Let’s take a look at how to create a Shared Album for your event.
Create Your Shared Album
It’s easy to create a Shared Album. Just follow these steps:
- Sign up to create a Shared Album.
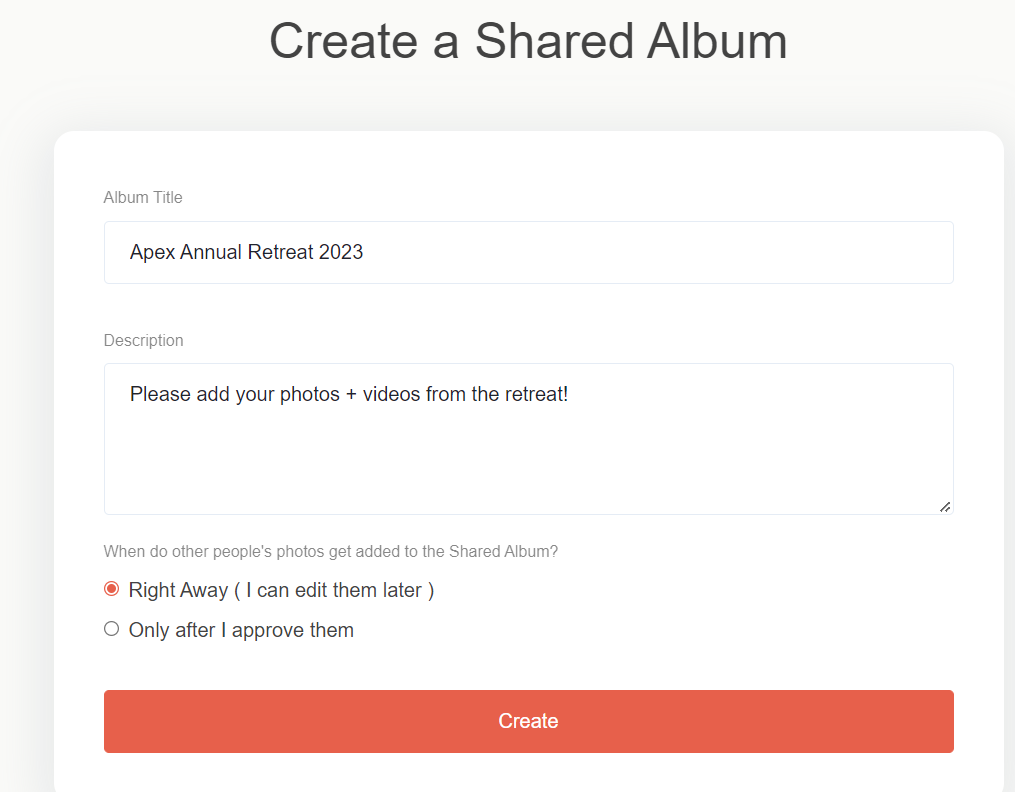
- On the Shared Albums page, click the orange “Create Shared Album” button.
- Give your album a Title and enter a Description.
- TIP: Worried someone will upload a photo you don’t want to share? Choose when to add people’s photos: either review and approve photos before they appear in the album or let contributors add them right away.
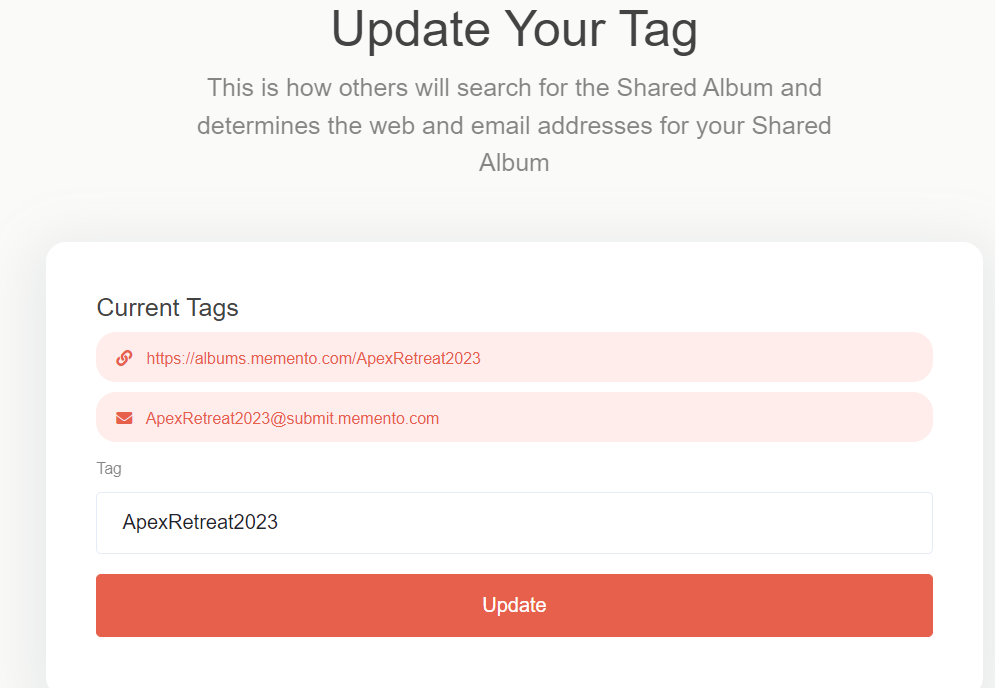
- Update your tag (this is how other people can locate your album). The tag will be used in the link for your album as well as the email address.
- TIP: Tags should be something people will remember and can include your company name and date (like “Apex-Retreat-2023” or “ApexRetreat2023”).
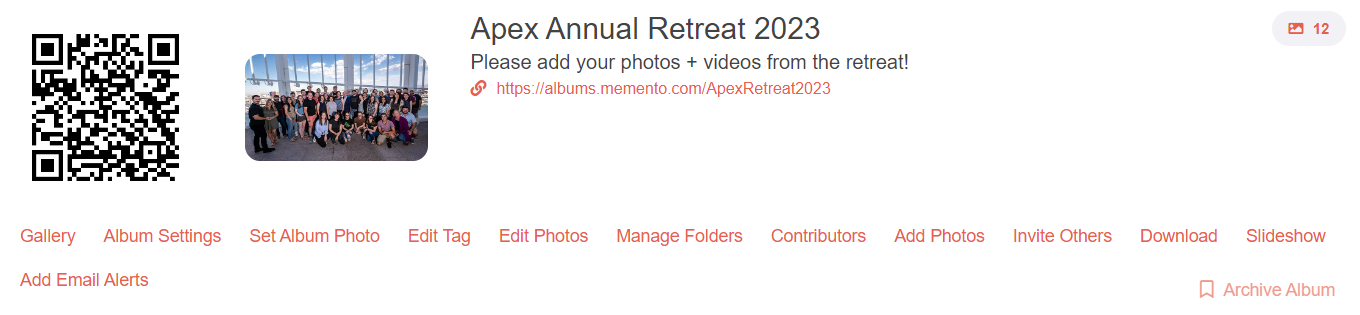
- Set your album photo. Click the “Set Album Photo” link and upload a photo to personalize the album. The photo will display at the top of your gallery to help contributors identify your Shared Album.
Invite Contributors
Now that you’ve created your Shared Album, read on for ways to invite others to contribute their photos and videos.
- After you create your album, you’ll land on the Dashboard page. At the bottom, click the “Invite Others” link.
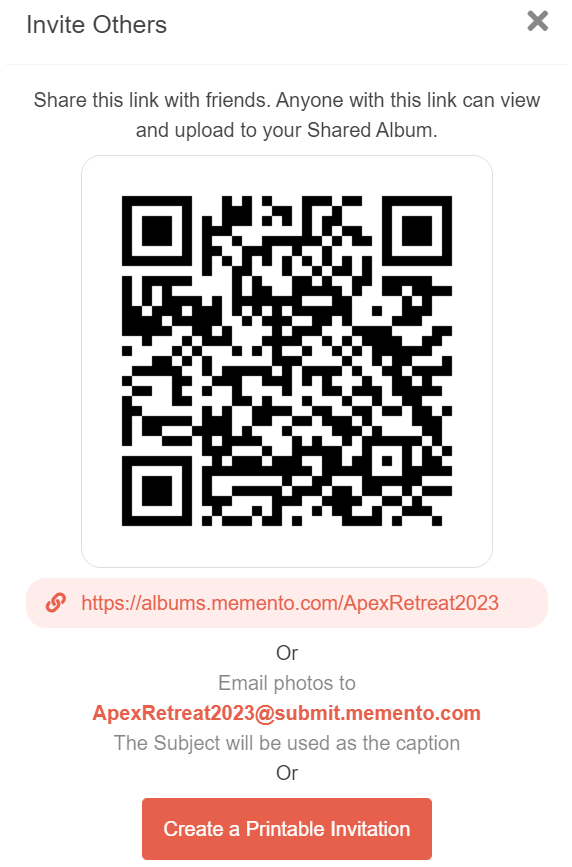
- You can share your album with others through a QR code, link, and an email address. You can also create a printable invitation.
- Copy your preferred method and paste it into an email, text message, etc. then send it to guests before your event!
- TIP: An easy way to remind attendees to share their photos is with printed signs or table tents. Print your QR code on card stock along with instructions on how to upload photos and place them throughout the event space. Guests can simply snap a pic and share right from their phones.
Album Settings
First, go to your Dashboard (click “Shared Albums” at any time at the top of the page) and from there click “Album Settings” to start organizing.
Here are just a few of the settings you can control:
General
- Photo layout (grid styles vs waterfall)
- Photo sort method (date taken, upload date, file name, etc.)
- Group the photos by the person who uploaded them
Social
- Allow comments and likes
- Let people share on Twitter, Facebook, etc.
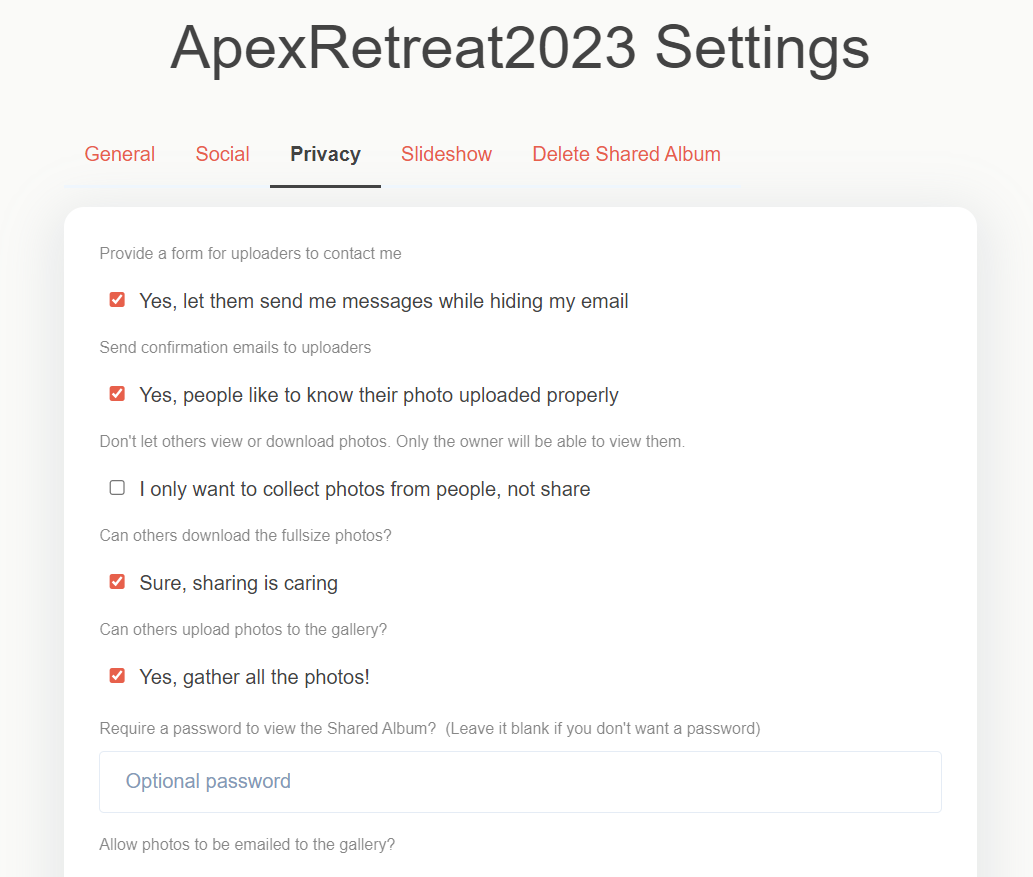
Privacy
- Send confirmation emails to uploaders
- Let others download full size photos
- Require a password to view the Shared Album
Slideshow
- Set the pause time on photos
- Show or hide photo captions
- Choose background music
- TIP: Shared Albums let you display photos as they’re uploaded in a live, interactive slideshow. Set up a big screen at your event so guests can see their photos as they post them!

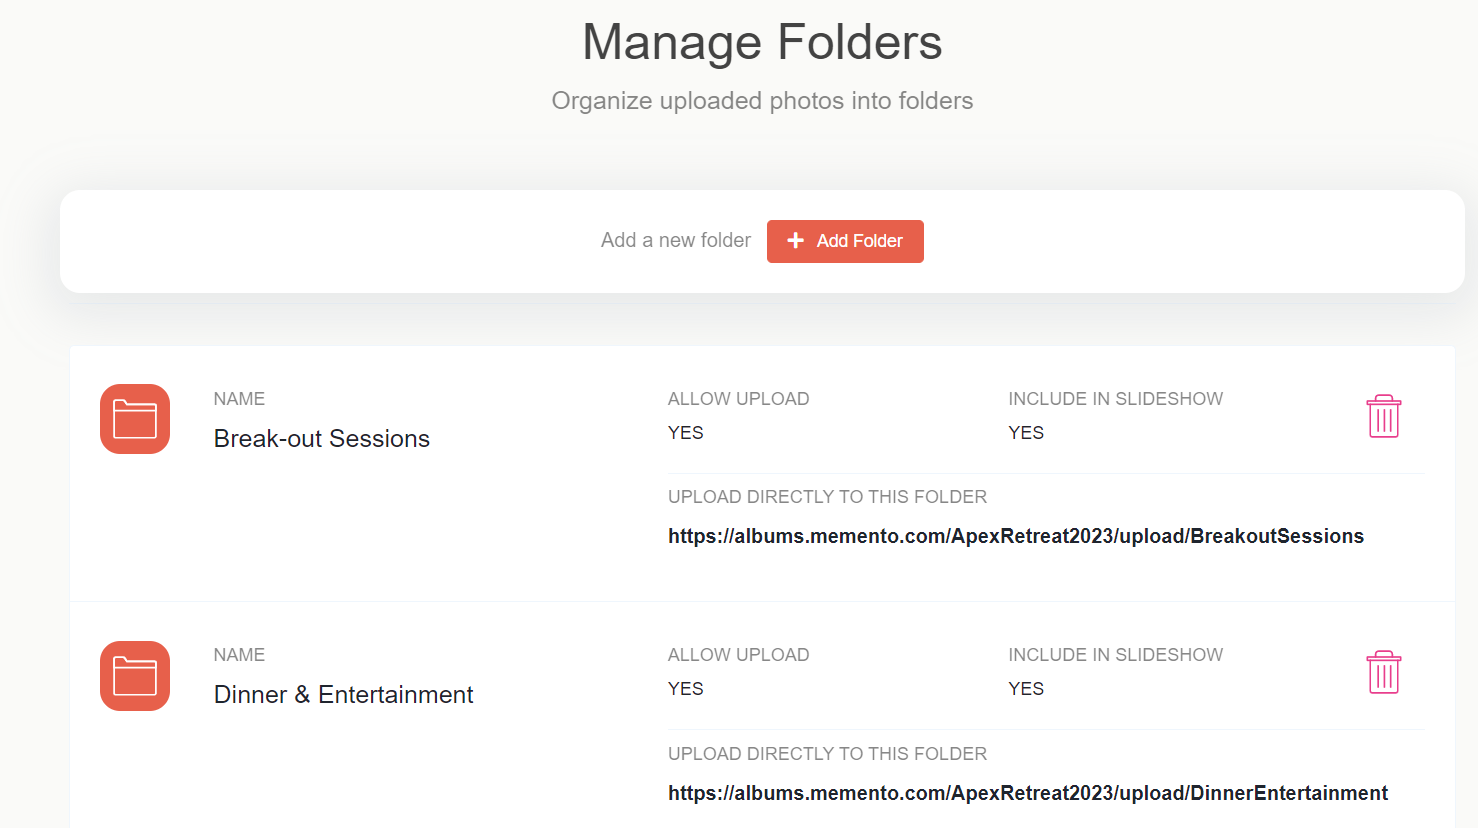
Organize with Folders
If your gathering has multiple events such as break-out sessions, a company-wide meeting, dinner, and entertainment, create folders based on each event to keep photos organized.
To add folders, click “Manage Folders” from your Dashboard and start organizing!
Share & Download
One of the best parts about Shared Albums is that you can easily share your album with all the contributors through a link, customizable slideshow, or zip file, and contributors can download high-resolution files from any device.
To download a zip file:
- Go to your Dashboard
- Click the “Download” link
- Click the button to “Download All Files”
- TIP: Put those photos to good use! Download your favorite pictures at the same full resolution after your event to use in internal newsletters or your company website.
Photo sharing doesn’t have to be complicated. Create a Shared Album to easily collect photos and share them with your team so you spend less time hunting down photos and more time basking in the afterglow of a successful event.